welcome to
The tomkat studio blog
Search
{Tutorial} Giant Quilled Snowflakes from the Sugar Plum Fairy Party
Share To:
The response to the Sugar Plum Fairy Party we recently featured was outstanding! And the question we got asked the most was how to make the giant snowflakes! Nicole, the party designer, has offered us a tutorial on how to make these beauties. Here are her instructions:
Large-scale Quilled Snowflakes Tutorial
Materials:
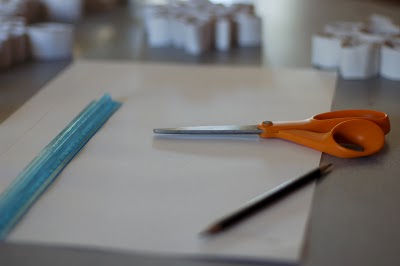
One package of large construction paper (approximately 10×15), available at any major craft store.
school glue
scissors
paperclips
1) Cut the construction paper into long, 1″ wide strips.
2) Roll up each strip into a tight coil. Let uncoil slightly, and glue into a coiled circle shape using a small dab of Elmer’s school glue. If necessary, use a paperclip to hold the glued end in place for a few minutes until the glue dries slightly.
3) Make a lot of these coils (many of my snowflakes had more than 20 coils). Turn some into teardrop shapes by pinching one side of the coiled circle. Turn into eye shapes (kind of oval, but pointed on both ends) by pinching the coiled circle on opposite sides. These are your basic shapes. There are other, more complicated ways to shape paper for quilling, but these three basic shapes will let you make many, many beautiful snowflake designs. Create extra variety while still using just these shapes by coiling some shapes tighter or looser to make smaller and larger shapes. Cut your strips in half to make very small circles (especially nice toward the outer edges of the snowflake, where you want a more delicate appearance.) Here’s a nice little resource I found on some other basic shapes: http://www.quilledcreations.com/QuillingBasics-Shapes.asp
4) Once you’ve made a bunch of the coiled shapes, start playing around, arranging them until you find a design you like. Glue together using the school glue. Don’t use too much, though, or it will drip down and glue your snowflake to your work surface! You really don’t need much to create a strong bond. I usually start with six of the same shape glued in a circle as the center of the snowflake, then start building outward. I suppose you could use a hot glue gun on snowflakes this scale. It’s not something you’d use on typical quilling projects (there would be more hot glue than paper on those tiny snowflakes!) and I didn’t think of the possibility until just now! But I think it would definitely work, and could really speed up the process if you’re making quite a few of these large pieces.
One of the most lovely things about these snowflakes (and something I didn’t actually expect until they were hanging in place) is that the lacy shadows of the snowflakes are just as lovely as the snowflakes themselves. What a happy accident gracing the walls!
I hung the snowflakes in place by first drilling holes into the studs and screwing C hooks into the walls. I strung silver wire between the hooks, and suspended the snowflakes at varying heights from the wire using mono-filament. You could barely tell that the wire and mono-filament were there, creating exactly the magical indoor flurry of snowflakes I had imagined.
Thank you Nicole for sharing your creativity with us!!
December 28, 2010
Post Date:
Leave a Reply
SUBSCRIBE
Don't miss a thing! Subscribe to our email list to keep up with our latest projects, listings, blog posts and giveaways!


Those are LOVELY!! Can't wait to try them.
Kisses
Heather from WhipperBerry
Beautiful! We're going to do ths today…my son and I
AudreyGardenLady
Kim I love Beacons 3 n 1 Craft Glue for my paper crafts!! It is fantastic! Dries clear and quick!! I think I might make these for my New Years Eve party!!
These are great! Thanks! I love snowflakes but usually do the traditional ones. Will definitely give these a try!
I love this! My BF Daughter's birthday is in January and it rarely snows in Houston, these will be perfect! We want to do Winter Wonderland!
That´s really lovely!
Warm hugs from Brazil!
Wonderful snowflakes, tutorial, and pics! Quilling is amazing – it uses such simple supplies to get stunning effects like this.
Thank you thank you, I was just telling my mom about these yesterday and hoping that we would be blessed enough to get a tutorial!!!
Thank you SO much for sharing! I was really hoping you would share a tutorial on how to make these. They are just GORGEOUS!
Thank you, you've made it so easy. I am going to spray paint them pink, purple and red for bouquet for a valentine's day themed birthday party!
these are so cute! I saw them over at "all things paper" and I fell in love with them 🙂 You are very creative, I never thought of making them in giant sizE! I've made smaller quilled snowflakes, but these are just dazzling!! 🙂
Thanks for sharing!!
Love,
The Creative Muslimah @ http://www.thecreativemuslimah.blogspot.com
Excellent, what a weblog it is! This webpage presents valuable data
to us, keep it up.
I have been looking for this kind of creation to inspire me. Thank you for sharing your talent. Kudos! 🙂